The Advanced Guide to LVM-Logical Volume Management on Linux: PART 1

Most of the computer users out there must have felt a need for increasing or decreasing (resizing) partition size after it is created, at least once. And if you are working in a production environment you might at times need to make a large partition, by combining small hard disks of various size, so that, it appears as one large hard disk/partition to the operating system.
The above mentioned things can be achieved by a technology called as Logical Volume Management or commonly known as LVM. Heinz Mauelshagen wrote the initial code for LVM that works on a HP Unix system. Later on, all modern day Linux distributions began to use it as a mechanism to provide flexibility in storage by providing the capability to resize, and combine multiple physical hard disks of various size to a single logical volume, for the operating system to use.
LVM can be defined as a software disk management on top of physical hard disks, in order to provide features such as making large volumes by combining multiple hard disks, easy resizing of a partition, removing of physical disks without affecting data online, improving the throughput by striping data across multiple physical disks, easy backup management with the help of snapshots etc. LVM also provides, mechanisms that are similar to raid level 1 and raid level 0(mirroring and striping), if you are interested in understanding raid, i will recommend reading the below articles.
Read: Different Levels of Raid Explained
Read: Raid Level 1 configuration in Linux
Read: Raid Level 0 configuration in Linux
Keep the fact in mind that throughout this guide, we will be using Red hat/Centos based distributions for understanding LVM. The implementation of LVM on other distributions are almost the same. Please let us know in case you face any issues, while following this guide. Also please let us know you views and suggestions to improve this article(or any article on slashroot.in), through comments.
What are the components of LVM(Logical Volume Management)
In order to understand LVM in a easier way, we have divided each and every component of LVM into different parts, and each part is studied separately. In this section let's go through each and every components of LVM.
(1) Physical disks or Physical volume
As we have discussed earlier, a large partition can be made by combining different hard disks or partitions together. Physical disks or physical volumes are either entire hard disks or partitions. You might ask why partitions?
LVM is a software implementation, hence you can supply a partition of any size, or an entire physical hard disk of any size, or a single big partition made out of a hard disk, as a physical disk.
Either you allocate a hard disk, or a partition, as a physical disk, you first need to label that device as physical volume for LVM. This labeling of the device(a partition or a hard disk) can be done by adding a label at the second sector of the device, by using fdisk command. This kind of labeling the partition or hard disk will make identifying a physical volume easier.
So lets create three different partitions of 100 MB, and label it as LVM physical volume, (in real world you can use three different hard disks as physical volumes.)
[root@localhost ~]# fdisk /dev/sda The number of cylinders for this disk is set to 19457. There is nothing wrong with that, but this is larger than 1024, and could in certain setups cause problems with: 1) software that runs at boot time (e.g., old versions of LILO) 2) booting and partitioning software from other OSs (e.g., DOS FDISK, OS/2 FDISK) Command (m for help): n First cylinder (18869-19457, default 18869): Using default value 18869 Last cylinder or +size or +sizeM or +sizeK (18869-19457, default 19457): +100M Command (m for help): w The partition table has been altered! Calling ioctl() to re-read partition table. WARNING: Re-reading the partition table failed with error 16: Device or resource busy. The kernel still uses the old table. The new table will be used at the next reboot. Syncing disks.
Repeat the above mentioned steps three times to create 3 partitions of 100 MB. We will be using these three partitions as Physical volumes for LVM, so lets change the partition label for them to LVM. This can be done by the following method.
[root@localhost ~]# fdisk /dev/sda

The number of cylinders for this disk is set to 19457.
There is nothing wrong with that, but this is larger than 1024,
and could in certain setups cause problems with:
1) software that runs at boot time (e.g., old versions of LILO)
2) booting and partitioning software from other OSs
   (e.g., DOS FDISK, OS/2 FDISK)

Command (m for help): t            ------------->> t is used to change the partition system ID.
Partition number (1-8): 8          ------------->> 8 means here partition number 8 i.e /dev/sda8
Hex code (type L to list codes): l ------------->> l is used to see list of codes
Hex code (type L to list codes): 8e    ------->> 8e denotes LVM partition Type
Changed system type of partition 8 to 8e (Linux LVM)
In the above shown method, we have changed the partition label type to 8e (which is used to label a partition with Linux LVM type). Do this for all the three partitions we have created, so that all of them can be made to LVM physical volume type.
Keep the following things in mind, while changing the type of a partition to LVM in Linux. The below points mentions the reason for changing the type, what does the type change do.
- LVM label on a partition will help the system to identify the disk/partition as LVM physical volume
- The label resides on the second sector (by default a sector is assumed as 512 bytes)
- It contains the size of the physical volume
- It will also tell the location of the LVM metadata on that physical disk/volume (don't worry! we will be discussing lvm metadata on the next section of this tutorial)
- Label also provides a Unique Identification to the physical volume.
To understand what is UUID in a partition, i will recommend reading the below post.
Read: What is UUID in a Partition
Let me make that point clear once again. We have used partitions while creating physical volumes in the above example(3 partitions of 100 MB size), however you can use whole hard disks as physical volumes in LVM. The contents of a physical volume are depicted in the below diagram, to make the above mentioned points about physical volume very clear.

The above shown picture gives a clear idea about how a physical volume is laid out in LVM. All the three physical disks(partitions in our case), has the layout similar to the one shown in the above picture.
However we have only changed the type of the partitions to LVM, in order to create a physical volume we need to take help of a command called as pvcreate.
[root@localhost ~]# pvcreate /dev/sda{6,7,8}        ---->> physical volume creation
  Physical volume "/dev/sda6" successfully created
  Physical volume "/dev/sda7" successfully created
  Physical volume "/dev/sda8" successfully created
If you see the above command, we have only supplied partition names to the command as argument. That creates three physical volumes for our LVM.
There are two other commands(pvscan and pvdisplay), that provides you with complete information regarding the physical volumes on the system.
[root@localhost ~]# pvscan
  PV /dev/sda6                      lvm2 [101.94 MB]     ---->>First drive
  PV /dev/sda7                      lvm2 [101.94 MB]     ---->>Second Drive
  PV /dev/sda8                      lvm2 [101.94 MB]     ---->>Third Drive
  Total: 3 [305.83 MB] / in use: 0 [0   ] / in no VG: 3 [305.83 MB]
pvdisplay command provides you with complete information of all the physical volumes on the system. The information provided by pvdisplay command includes UUID of the physical volume, size of the volume, volume name, size remaining etc.
[root@localhost ~]# pvdisplay             ---->>display physical Volume information.
  "/dev/sda6" is a new physical volume of "101.94 MB"
  --- NEW Physical volume ---
  PV Name               /dev/sda6
  VG Name
  PV Size               101.94 MB
  Allocatable           NO
  PE Size (KByte)       0
  Total PE              0
  Free PE               0
  Allocated PE          0
  PV UUID               cfz6P0-VVhD-fWUs-sbRj-0pgM-F0JM-76iVOg
By default the pvdisplay command will display all physical volumes. I have suppressed the remaining two volumes in the above output.
Now lets go ahead and understand the second component of a LVM.
(2) Volume Group in LVM
In the previous section we saw how to label disks or partitions, so that they can be used as physical volumes. The concept behind LVM is to combine multiple physical disks to make one volume group. This volume group will act as a one big hard disk, having the combined size of the physical disks added to the volume group.
We will be discussing two important things in this section of volume group, which is the main building block of LVM. Although i feel that i should have explained one of them during physical volume creation, i kept it purposely for this section, because the thing comes into play while creating volume groups. Those two things are mentioned below.
- Physical Extents
- Logical Extents
As told before, a volume group is nothing but a large pool of disk space created from all the physical disks. LVM is capable of doing operations such as increasing, decreasing the size of a logical volume(which we will be discussing later) because the physical volume is made up of small chunks which are always of fixed size. Each physical disk that combinely makes up a volume group will have a number of small chunks of equal size, where data will reside.
This small chunks of equal size, which makes up the physical volumes are called as Physical Extents. Creating a volume group simply combines all the physical extents of all the physical volumes to form one large logical volume group.

The above diagram depicts the things we discussed about the physical extents. In the above figure, a volume group is made from two physical volumes with 5 physical extents of the same size. (PE in the above figure stands for physical extents.)
Let's create our volume group with the physical disks which we labeled during the previous section with the help of a command called as vgcreate.
[root@localhost ~]# vgcreate vg00 /dev/sda6 /dev/sda7 /dev/sda8  --->>Volume group creation.
  Volume group "vg00" successfully created
The above command creates a volume group with the three physical volumes (partitions in our case /dev/sda6,sda7,sda8). And a name vg00 is assigned to that volume group. For activating this volume group, you need to run the command vgchange
[root@localhost ~]# vgchange -a y vg00                   ---->>activate volume group vg00
  0 logical volume(s) in volume group "vg00" now active
Let's now see the complete information of the volume group created with vgdisplay command.
[root@localhost ~]# vgdisplay             ---->>Display volume group information.
  --- Volume group ---
  VG Name               vg00
  System ID
  Format                lvm2
  Metadata Areas        3
  Metadata Sequence No  1
  VG Access             read/write
  VG Status             resizable
  MAX LV                0
  Cur LV                0
  Open LV               0
  Max PV                0
  Cur PV                3
  Act PV                3
  VG Size               300.00 MB        --->>size of volume group.
  PE Size               4.00 MB
  Total PE              75
  Alloc PE / Size       0 / 0
  Free  PE / Size       75 / 300.00 MB
  VG UUID               H3FYcT-1u28-i8ln-ehNm-DbFM-nelQ-3UFSnw
The above command output gives you the complete information about the volume group created. Most importantly, we need to note the below things.
- Version of LVM used (lvm 2 in our case)
- Volume group name (vg00)
- Metadata details
- Physical extent size (by default its 4 mb in lvm 2, we will be see changing that default physical extent size later)
- number of physical extents in volume group
- Free physical extents in the Volume group
- UUID of the volume group
You can change the Physical extent size from the default value of 4 MB to whatever you like based on the requirement, while creating the volume group. Lets change the physical extent size while creating the volume group. Keep the fact in mind that, you cant change the physical extent size once the volume group is created.
[root@localhost ~]# vgcreate vg00 /dev/sda6 /dev/sda7 /dev/sda8 -s 34M
The above command will make the volume group with exactly the same name, but will keep the physical extent size as 34 MB, instead of the default 4MB(which you can verify later on with vgdisplay command).
Now lets go ahead with understanding the last component of LVM, which the operating system and the user will be using for storing files and data.
(3) Logical Volume in LVM
The volume group which we just made, is a pool of disk space, by combining all physical extents of all the physical volumes. We can make partitions from this large volume group by creating logical volumes. These logical volumes are the real place, where the user will be accessing the data.
There are three kinds of logical volumes in LVM. Lets understand each of them first, and then will see methods to create logical volumes from a volume group.
- Linear Logical Volumes
Linear logical volumes are nothing but a logical volume made by simply combining multiple physical volumes to one. Let's take an example, to understand linear logical volumes in a much better way. say you have two physical volumes that have 50 physical extents of 4 MB each. Which means one physical volume is of 200M B (50 x 4).

In the above shown example, we have two physical disk with 50 Physical extents of 4 MB each, making a 200 MB disk. While creating a Linear logical volume it will be a combined use of physical extents on both the physical volumes in order.
To the operating system the logical volume created will appear as one single disk with 100 physical extent(although the physical extents are spread on two physical disk linearly.). Another important fact to note here is that, it is not necessary to have two physical volume of same size, in other words, you can have a different number of physical extent in two physical volume that will combine and create one logical volume with the size of both the disks. So for example, you can have one physical volume with 60 physical extent and other physical volume with 40 physical extent, that will combine together and form 100 physical extent in one logical volume.
Let's go ahead and see the commands, that are used while creating a linear volume in LVM.
[root@myvm1 ~]# lvcreate -L1000 -n example examplevg
Above command creates a linear logical volume of 1000 MB with the name of example, on the volume group examplevg. If no unit (M,K,G) is specified along with the -L option in the above command, M is assumed.
Alternatively instead of specifying the size in megabytes, or gigabytes, you can also specify the number of physical extents to be used in that logical volume with the help of -l (lower case letter) option. Lets see a couple of similar example.
[root@myvm1 ~]# lvcreate -l 100 -n example examplevg
the above command will create a logical volume by using 100 logical extents(size of logical extent = size of physical extent), to create the logical volume. Now you if you know the physical extent size, then you can easily calculate the volume size in MB. Alternatively, you can also specify which extents to use from which physical volumes in the volume group.
[root@myvm1 ~]# lvcreate -l 100 -n example examplevg /dev/sda1:25-50 /dev/sdb1:100-176
the above command will create a logical volume of 100 extents, and will use the the extents 25 to 50 from /dev/sda1 and then 75 extents from /dev/sdb1(ranging from 100 to 176)
- Stripped logical volume in LVM
One of the major strength of logical volumes made out of LVM is that, you can in fact control the way data is structured across the underlying physical disks. Lets see how data is structured when we configure stripped logical volume. Stripped logical volume is very much similar to raid level 0.
In stripped logical volume, data in the underlying physical volume is stripped across the number of physical disks. Similar to raid level 0 which employs striping across the disks, a logical volume with striping will improve both sequential read and writes.

If see the above picture, the data is striped across three different physical disks. First stripe is on the first physical disk, second stripe is on the second and so on.
You can create a striped logical volume with the help of lvcreate command. Creating a striped logical volume can be done by using -i option in lvcreate command. The number specified using this option is the number of physical disk, that the logical volume will be stripped. Let's see the below example.
[root@myvm1 ~]# lvcreate -L 10G -i2 -I64 -n example examplevg
The above command will create a striped logical volume with the stripe size of 64 kb, and a total size of 10G, and will use 2 physical volume for the stripes, and will be named example, on the volume group named examplevg.
You might remember that, you can create a volume group from different sized physical volumes. In that case the maximum size of a striped logical volume can only be equal to the size of the smallest physical volume.
- Mirrored Logical Volume
Mirrored logical volumes are very much similar to raid level 1 in which data is mirrored across the number of disks used. It provides better redundancy for the data.
In easy words, you can say that an exact replica copy of one physical disk is present on the other physical disk. While creating logical volume with mirrors, you can give multiple mirrors for the data. Mirroring of a logical volume requires at least three physical volumes.
- The first physical volume will act as the first mirror leg
- The second physical volume will act as the second mirror leg
- The third physical volume will be saving logs related to the mirroring

In the above example, the first two physical volume acts as two mirrored legs, and the third one stores the log, of what is synced in mirrors and what is not synced in the mirrors.
Let's now go ahead and create a logical volume with mirroring.
[root@myvm1 ~]# lvcreate -L 10G -m1 -n mirrorexample examplevg
In the above command, -L option is used to specify the size of the logical volume, -m option is used to specify number of mirrors for the logical volume(in our case we have used one mirror), and the name of the logical volume is mirrorexample and is created from a volume group known as examplevg.
Specifying the m1 option will create two copies of the file system, one is the linear volume and the other is the mirror of the volume. Hence if you want two mirrors then you need to specify -m2 option with lvcreate command.
You can always convert a linear volume to a mirrored volume or a mirrored volume to a linear volume by using the below method.
[root@myvm1 ~]# lvconvert -m1 /dev/vg00/lv0
the above command can be used to convert the linear logical volume to a mirrored logical volume with one mirror, and its name is /dev/vg00/lv0.
[root@myvm1 ~]# lvconvert -m0 /dev/vg00/lv0
With the help of the above command, you can remove mirroring from a logical volume named /dev/vg00/lv0.
Note: In all the above shown example's of creating logical volume of any type, you need to first format the logical volume with your required file system, similar to the formatting done on any normal partition, and mount them to use.
Let's now have a look at different commands of LVM and see what they does. We will also be seeing methods used to resize an existing logical volume and much more.
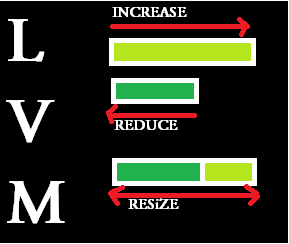
How to resize an LVM, logical volume?
Resizing of a logical volume can be done by simple lvextend and lvreduce commands in Linux. We will be going through both increasing as well as decreasing the size of an LVM in Linux.
The first step that needs to be taken before resizing is to unmount the logical volume if its currently being used. Let's begin by increasing the size of the LVM.
[root@localhost ~]# lvextend -L +50M /dev/vg00/lv00  -->> I am increasing logical volume to 50mb.
  Rounding up size to full physical extent 52.00 MB
  Extending logical volume lv00 to 204.00 MB
  Logical volume lv00 successfully resized
The above command, can be used to increase the size of the logical volume by 50 M. -L is used to specify the amount of size to increase, and then the last argument is of course the logical volume name.
Now let's make the volume group active before using the resized logical volume with the help of the below command.
[root@localhost ~]# vgchange -a y vg00      --->>activating change.
  1 logical volume(s) in volume group "vg00" now active
Now before mounting the resized Logical volume, lets format the newly added space with the help of resizefs command.
[root@localhost ~]# resize2fs /dev/vg00/lv00
resize2fs 1.39 (29-May-2006)
Filesystem at /dev/vg00/lv00 is mounted on /slashroot.in; on-line resizing required
Performing an on-line resize of /dev/vg00/lv00 to 208896 (1k) blocks.
The filesystem on /dev/vg00/lv00 is now 208896 blocks long.
Now you can simply mount the logical volume, at your required mount point, and start using the increased size of the logical volume. Let's now see the method used to decrease the size of a logical volume.
Its always recommended to do an fsck file system check before reducing the size of the logical volume. After running fsck, you need to first unmount the file system, and then reduce the size of the file system with the help of resize2fs command as shown below.
[root@localhost ~]# resize2fs /dev/vg00/lv00 100M  -->>resize filesystem
resize2fs 1.39 (29-May-2006)
Resizing the filesystem on /dev/vg00/lv00 to 102400 (1k) blocks.
The filesystem on /dev/vg00/lv00 is now 102400 blocks long.
Note the fact the 100M specified in the above command, is the final size of the file system after reduction(it is not the size by which the file system will get reduced to, but is the final size of the file system).
Now you can reduce the size of he logical volume by lvreduce command as shown below.
[root@localhost ~]# lvreduce /dev/vg00/lv00 -L 100M  -->>I am reducing logical volume to 100mb.
  WARNING: Reducing active logical volume to 100.00 MB
  THIS MAY DESTROY YOUR DATA (filesystem etc.)
Do you really want to reduce lv00? [y/n]: y
  Reducing logical volume lv00 to 100.00 MB
  Logical volume lv00 successfully resized
In the above command also the logical volume is reduced to 100 M not by 100 M.
Now you can simply mount the volume back and confirm the new size. We will be coming up with a second part of this post, which will be discussing some interesting things like the following.
- Take metadata backup of an LVM
- Move a complete LVM from one server to another server
- Mirroring of logical volume in depth as well as mirroring for log
- Taking snapshots
- As well as some other interesting LVM commands.
 Sarath Pillai
 Satish Tiwary
Comments
Regarding LV mirroring
Nice tutorial..
I have a que.
Where i can access the mirrored lv.
Thanks-
Himanshu
Hi Himanshu,
Hi Himanshu,
Am quite not clear about your question. Do you want to create a Mirrored logical volume?
In Any case, you will have to mount it under a directory and then access it like any normal partition(I have explained mirrored LVM in this article.)..
Regards
how to disk stripping using lvm??
Dear sir ,
how disk mirroring and stripping using lvm and how to do monitor disk stripping and miiroring in lvm???
Difference between LVM Versions
Hi,
Admin, thank you so much for this informative site, this is one of best known sites for linux.
I have a Question in LVM, what is the difference among lvm version 1,2 and 3.
migrate from lvm to normal partition
Hello,
I have LVM in my system with 500 gB data, i wna to migrate from LVM to normal partition.
Ho can achieved this, without loosing data, I don't have any extra harddrive.
Please any one suggest me.
Migrate LVM to Normal Partition
Hi,
Unfortunately, you either need another 500G space in the existing drive, so that you can create another normal partition to back up the entire logical volume using dd.
Or any external medium is very much required, to prevent data loss.
Thanks
LVM
Excellent tutorial for types of LVM.
Thanks
PART 1? And now?
Hello,
the title "The Advanced Guide to LVM-Logical Volume Management on Linux: PART 1" implies to me there is more (i.e. PART 2, 3, ...) coming? Am i wrong?
Best,
-tyrone
Excellent...Work
Excellent...Work
Nice Explanation with clear example..
Any article about FTP,NFS,NIS,DNS,DHCP,APACHE concept....
Please provide the Link..
premalink
I have mounted partitions it is full how to resize or increase the partition.
I didnt create any lvms. then by lvm concept how i increase mounted partitions or already
existing partition. can you plz give me clear clarification
Excellent work
This Document very very help full to me,
Thank you so much dude.
Where i can find Part2
I can't find part2 of The Advanced Guide to LVM-Logical Volume Management on Linux.
Please send me link, if it not released yet than please do it asap. This will be very helpful.
Reducing /var
What is the best procedure to reduce /var which has all the logs keeping writing everytime. ?
Add new comment